After months of planning and weeks of hard work, you have all your belongings packed up and are ready to move out of your rental. But wait, there is a box that can’t be taped up right now; cleaning supplies. But, don’t worry, you will not have to spend money on cleaning services for this one. Here are some practical cleaning tips for moving out.
When cleaning your rental, it is essential to follow the top-to-bottom approach. You start with the ceiling, move onto the walls and finally address the flooring in the end. This way, all the dust falls to the ground, and you will save yourself from sweeping or vacuuming the floor multiple times.
Pull the Cobwebs
As your little house spider looks for a new address, it leaves behind its old home or part of it. These empty webs are a magnet for dust, pollen, and other debris.
Cobwebs often get overlooked as they can be hard to see. But remember to clear them before moving out. You can easily use your trusty vacuum or a broom to pull down these little abandoned dwellings. Look for them in the corners of the ceiling and other nooks and crannies.
Dust the Blinds
As childish as it may sound, trust us on this one! Get hold of an old sock, dampen it, and put it on like a glove. You could opt to use a microfiber cloth dipped in some cleaning solution, but why make things difficult when the wet sock works just fine.
Close the blinds and just run your hand, or sock, across each slat to take care of the dust. Flip the blinds and repeat. Just be careful not to get the blinds too wet, and you will be well on your way in no time.
Squeegee the Windows
No, you don’t need to point a running hose at your window. All you need is some glass cleaner and a lint-free cloth. Spray the glass cleaner on your window thoroughly and wipe with a lint-free cloth.
If you do not have any glass cleaner lying around, you can make a solution with water, a few drops of dishwashing liquid, and some vinegar. Spray the solution onto the glass and wipe with your cloth for a streak-free shine.
If you want to wash the windows from the outside, you might need a bucket and a soft sponge. Dip the sponge in the dishwashing liquid solution above and rinse thoroughly. If any stubborn stains remain, spray them with diluted vinegar and let them soak for a while before wiping with a clean cloth.
In addition to the glass panes, make sure to dust off the locks, handles, and tracks. For hard-to-reach areas, an old toothbrush dipped in a dishwashing solution works wonders.
Patch the Walls
While your gallery wall never failed to impress, the nails you have now are an eyesore. You will need to pull out the nails and fill the holes.
You will require some supplies to fill these holes; it is essential to have:
- Nail Puller and a screwdriver
- Spackle or Putty with Putty knife
- Fine sandpaper
- Matching paint and small paintbrush for painting over the fillings
The steps to follow are simple:
- Pull the nail out
- Apply the putty onto the hole using the putty knife
- Allow drying for a few minutes
- Rub over the filled spot gently with sandpaper
- Paint the filling to match your wall
Light the Lights
Check for any lights that may have gone out and replace them as required. This step becomes more significant if you had all the lights working when you moved in.
While you are at it, you can also use this opportunity to dust and clean the fixtures. You don’t need to take the whole chandelier apart, but make sure that all fixtures look clean. You can use telescopic dusters for those high, hard-to-reach lights.
Wipe the Walls
Stains on walls can be repulsive. But before you go into digging into the stains, you will need to make sure your wall is free of dust and debris. You can use an extendable duster to wipe your walls from top to bottom.
If you have painted walls, you can use the proper cleaners suited for your paint finish and wash the stain out. But if you have wallpapers, things can get a little technical. Some wallpapers are washable, and others are not. You will need to understand what works for your wallpaper type. Before applying any liquid directly onto the wallpaper, it is best to do a patch test in a hidden area of the room.
Vacuum the Carpets
The carpets have accumulated all the dust from your cleaning. Start by using your trusty vacuum cleaner to pull off the debris from the carpet. If you notice any stains, which you will for sure, you can use some commercial carpet cleaners on them. Let the cleaner sit on the stain for a while, and then use a clean cloth to blot the stain away. Some cleaners require dilution prior to use, so make sure you read the directions before pouring them on your carpet.
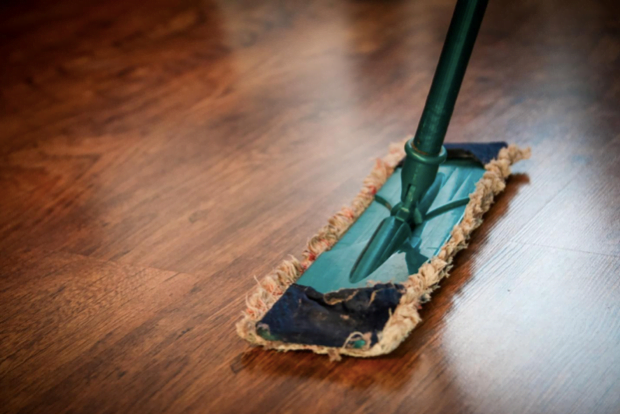
Mop the Floors
Last but not least, remember to vacuum and then mop the floors. Mopping should be the last chore you do in your rental home before moving out. This way, you will keep foot traffic to a minimum and keep the floor clean and shiny for inspection.
Last Few Words
It is essential to pay attention to the cleanliness of your rental before moving out. You must use a top-to-bottom cleaning approach to avoid duplicating the effort. Although you can call a cleaning company for assistance, you can do the work yourself and save a lot on the cleaning bill with these cleaning tips.
If you’re looking for more renter-friendly content, check out our some of our other blog posts here.
Considering moving into a new rental home? Dwellsy is here to help.